Are you looking for a fun and creative way to make a personalized gift for someone special? If so, then why not try making a wooden coffee mug! This project is a great way to show off your woodworking skills and create a unique and beautiful mug that your recipient will cherish for years to come. With the right materials and tools, you can make a custom wooden mug that is sure to impress. In this article, we will provide you with step-by-step instructions on how to finish a wooden coffee mug, from sanding the wood to applying the desired finish. We will also discuss some helpful tips on how to make the perfect wooden mug. So, if you are ready to get started, let’s dive in and learn how to finish a wooden coffee mug!
What are some finishing touches to wooden mugs? You spend less and less money on tools that are frequently used and, in many cases, the least expensive. 1 ounce of epoxy and 4 ounces of acetone should be dissolved in a gallon of water. SWMBO has used these spoons thousands of times in the dishwasher, and they are nearly always clean. Wood coatings are available for use in a variety of drinkable liquid applications. Their solution is made up of Plasite Epoxy Resin. The FDA has approved these foods for safe consumption. We recommend that you have proof that you are drinking water or alcohol. I used the two-ton epoxy I purchased from the two-part tube at Wally World.
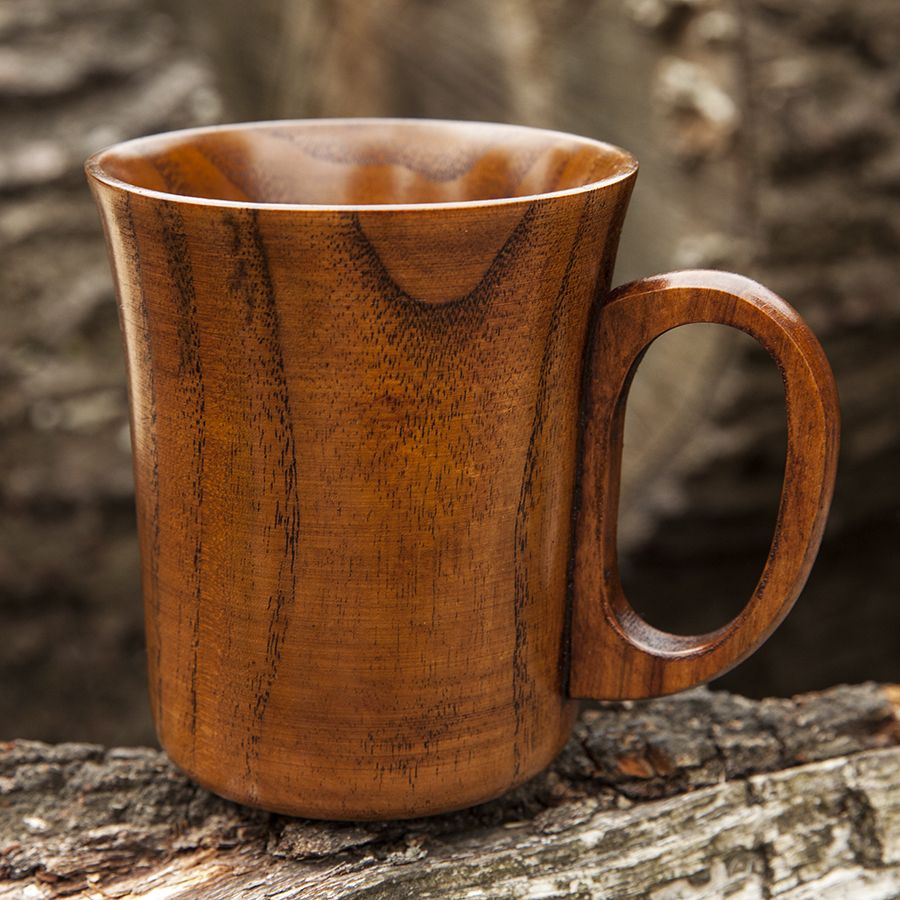
How Do You Seal A Wooden Coffee Mug?
Wood products can be easily mixed with mineral oils such as linoleum, Danish, teak, and coal tar. Apply the oil to the wood until it is absorbed, then repeat until all of the oil has gone into the wood. Allow the paint to sit for 24 hours before applying it to your clothes.
Wooden drinking cups have been a part of our culture since the dawn of time. A kuksa cup is a traditional example of a hand-carved wooden drinking cup made by indigenous people of Northern Europe. It is possible that a wooden cup will leak and be unsuitable for drinking if you are not familiar with how to seal it. The color of coconut oil differs from that of olive oil, which has a greenish hue. Beeswax does not need to be diluted and can be applied with a clean rag to the surface of the surface. In addition to providing beautiful shine to wooden surfaces, Linseed oil adds a yellowish tint. The wood’s long-term stability is ensured by using titan oil.
Woodworkers in China, Japan, and Taiwan use tatung oil to finish their wood. If you want a wood finish that is durable and high in sheen, walnut oil could be the best option. If you know how to seal and select the right materials, you will be able to finish your cup quickly.
Caring For Wooden Mugs: A Guide
The quality of wooden mugs varies, but they must be kept in good condition in order to preserve their beauty and uniqueness. To begin, it is critical to take the mug out of its container and place it in the humidity of your home. You can do this by rinsing the cup with tap water inside and out on a regular basis and allowing it to air dry after each use. It is best to store the mug for a few days so that it can be used for hot or cold liquids.
Coffee can be safely consumed in a wooden mug because the wood is treated with clear resin to protect it from anything it eats. Oiling the cup is also an important part of keeping it looking its best. To clean the cup, add a few drops of oil and wipe it with a clean rag. After drying for a few hours, you can repeat the process several times more. The oil should be applied six or seven times per day for a few days to keep the mug looking and feeling fresh.
What Finish To Use On A Wooden Mug?
When it comes to choosing a finish for a wooden mug, it is important to consider a few key points. Generally, a durable finish is best to ensure your mug will last. A good option is a polyurethane finish, as it is waterproof and provides a superior protection. Additionally, this finish is available in matte, satin, or gloss, so you can choose the look that best suits your needs. If you’re looking for a more natural finish, you can use an oil-based finish, which is food safe and perfect for items that come into contact with food or drinks. Ultimately, the finish you choose should provide the protection your mug needs, while also enhancing its look.
Because wood finishes are made of natural colors and grains, they can be appreciated for their beauty. There are many wood finishes that contain less harsh chemicals than commercial paint. Wood is not only porous, but also natural in nature, which can be used to seal it and finish it. Mineral oil does not alter the color of your wood, but it does soak into it. As a result, raw linseed oil provides a long-lasting finish and a yellow tint that adds character to your wood’s natural color. It is made from the nuts of trees that live in Asia and is designed to penetrate and harden wood to protect its surface. Walnut oil finishes contain a high level of chemicals that can harm your health if they come into contact with food or beverages.
Enjoy Your Wooden Mug For Years With Care
To make the most of your wooden mug, you should take special care of it. To make the mug comfortable in the humidity of your home, you should first “break in” it. It is best to rinse the cup inside and out with tap water once or twice per day, and then air dry. After a few days, you can use the mug for hot or cold beverages. Please keep in mind that the cups are made from a clear resin lining, which protects the wood from spills and other substances while you drink. As a result, you can drink coffee, tea, or any other beverage from a wooden mug with ease. Your wooden mug can last you for many years if left to dry properly.
How Do You Season A Wooden Cup?
To season a wooden cup, you will need to start by washing it in warm, soapy water. Dry it thoroughly and then rub it with a light coat of vegetable oil. Allow the oil to soak in for at least an hour, and repeat the process a few more times until the cup has a good coating of oil. Rub the cup down with a soft cloth after each application of oil and let it sit overnight to cure. After the cup has been cured, it can be used for drinking or serving drinks. The seasoning of the wooden cup will help to prevent it from drying out and cracking, as well as helping to keep it in good condition.
How To Make A Wooden Coffee Mug Without A Lathe
Making a wooden coffee mug without a lathe is possible and can be achieved with the right tools and materials. The main tools you will need are a drill, wood saw, chisel, sandpaper, and wood glue. First, you will need to select the wood for the mug. Hardwoods are best because they are more durable and will give a better finished product. Next, you will need to cut the wood into 3 pieces. One piece should be the base, one for the walls, and one for the handle. After the pieces are cut, you will need to drill a hole in the base and walls for the handle. Then, you will need to chisel the handle into shape. After the handle is finished, you will need to glue the pieces together, ensuring the handle will fit securely. Finally, you should sand the mug down to a smooth finish before applying a protective sealant. With a bit of patience and some basic tools, you can make a wooden coffee mug without a lathe!
This is an easy DIY Wooden Beer Mug (No Lathe). I can get a basic idea of how to make the mug from my Youtube Channel video, which includes a materials list and a list of tools. Because I do not have a lathe, I am unable to turn this piece on both the inside and outside. Instead, I’ll hollow it out with a forstner bit and then round it out with various methods outlined in a later article. The next step is to drill a hole with a forstner bit that measures 2.125 inches in diameter. Drill a hole about 1.50 inches from that point to make the cup shape. You could also do this with the following tools or techniques: a pencil sharpener with an angle grinder or aTURBOPlane Blade.
Next, the handle shape was developed, which was not based on anything but on the idea that it should resemble a handle and function exactly as it appears. Finally, I used Titebond II to apply glue to my handle. It is obvious that there are no screws or joinery in this photograph. It is as simple as applying a solid amount of glue, spreading it out, and holding it firmly to the mug surface for a few seconds. In practice, a strong glue joint would be required if it were properly clamped and tightened. If you want to learn more about any materials, tools, or general questions I have to answer, go to my website or call me at 604-341-2750.
How To Seal A Wooden Cup For Drinking
To seal a wooden cup for drinking, you will need a sealant and a brush or rag. Start by wiping down the cup with a damp cloth to remove any dust or debris. Then, apply the sealant to the cup using the brush or rag, making sure to cover the entire surface and any crevices. Allow the sealant to dry completely before using the cup. This will protect the wood and prevent any liquids from seeping in. For added protection, you can also apply a food-grade mineral oil to the cup, which will help make it water resistant.